
Make your own healthy and tasty fermented vegetables at home with our easy guide. Improve your gut health and enjoy the benefits of fermentation.
As the old saying goes, “you are what you eat.” So why not eat something that not only tastes delicious but also nourishes your body with a healthy dose of vitamins and probiotics?
Enter fermented vegetables, the latest buzz in the health and wellness world. Fermented vegetables are a great way to add variety to your diet and boost your gut health.

Fermentation has been used for centuries as a method of preserving food. It is a natural process in which microorganisms like bacteria and yeast convert the sugars in food into lactic acid, which acts as a natural preservative.
Fermentation also enhances the nutritional value of the food, making it more easily digestible and increasing the vitamin content.
Fermented vegetables are a great addition to any meal, and they come in a variety of flavours and textures. From tangy sauerkraut to spicy kimchi, there is a fermented vegetable for everyone. Plus, making fermented vegetables at home is easy and affordable, and it allows you to experiment with different flavours and ingredients.
In this blog post, we will take you through a step-by-step guide on how to make your own fermented vegetables at home. We’ll cover everything from choosing the right vegetables to the fermentation process and proper storage. So get ready to embark on a delicious and healthy journey with fermented vegetables!
I. Choose the Right Vegetables

The first step to making delicious fermented vegetables is to choose the right vegetables. Not all vegetables are created equal when it comes to fermentation. Vegetables that are high in natural sugars and starches are the best candidates for fermentation.
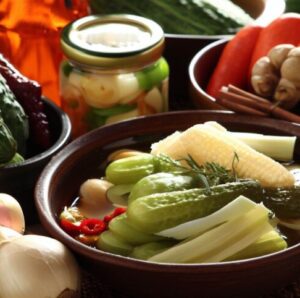
Examples of good fermentation vegetables include cabbage, carrots, cucumbers, beets, radishes, and onions. These vegetables will ferment well and result in a tangy and delicious flavour.
On the other hand, there are some vegetables that you should avoid when fermenting. These include vegetables with a high water content, such as lettuce and celery, as well as vegetables with a high oil content, such as avocado. These vegetables do not ferment well and can lead to spoilage.
When choosing vegetables for fermentation, it’s important to choose fresh, high-quality produce. Vegetables that are past their prime or have been sitting in the fridge for too long may not ferment properly.
II. Prepare the Vegetables

Once you’ve chosen your vegetables, it’s time to prepare them for fermentation. Start by washing and cleaning the vegetables thoroughly to remove any dirt or debris.
If you’re using cabbage, remove the outer leaves and set them aside. Cut or shred the vegetables into small pieces or thin strips.
Next, add salt to the vegetables. Salt is an essential ingredient in the fermentation process as it helps to draw out the natural juices from the vegetables and creates a brine that inhibits the growth of harmful bacteria.
The amount of salt you use will depend on the types and amounts of vegetables you’re using. As a general rule, use about 1 to 2 teaspoons of salt per pound of vegetables.
III. Pack the Vegetables in a Jar
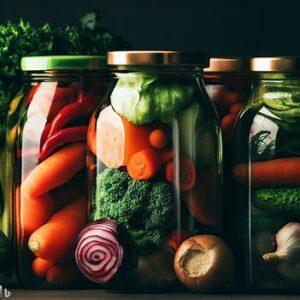
After the vegetables are salted, it’s time to pack them into a jar. Choose a jar that is suitable for fermentation. Mason jars are a popular choice as they are readily available and come in a variety of sizes. Make sure the jar is clean and sterilised before use.
Pack the vegetables tightly into the jar, pressing down firmly to remove any air pockets. Leave some space at the top of the jar for expansion during fermentation. If you’re using cabbage, use the outer leaves you set aside earlier to create a barrier between the vegetables and the air. This will help to prevent spoilage.
You can also add extra flavourings to the jar at this stage. Popular additions include garlic, ginger, herbs, and spices.
IV. Add a Fermentation Weight
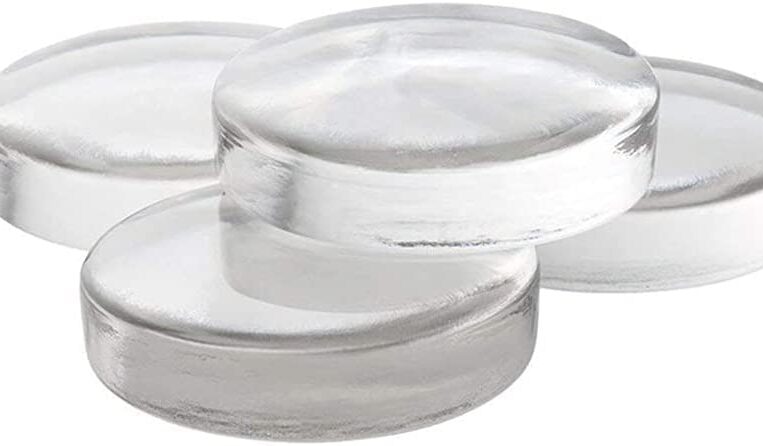
To ensure the vegetables ferment properly, it’s important to keep them submerged in the brine. This can be achieved by adding a fermentation weight to the jar. A fermentation weight is a heavy object that sits on top of the vegetables and keeps them submerged in the brine.
There are many types of fermentation weights available, including glass weights, ceramic weights, and stainless steel weights. You can also make your own weight at home using a clean rock or a plastic bag filled with water.
V. Cover and Ferment

When fermentation weights are added, it’s time to cover the jar. Choose a suitable cover that allows air to escape but keeps out dust and other contaminants.
A cloth or coffee filter secured with a rubber band works well.
Place the jar in a suitable location for fermentation. A cool, dark place is ideal. The length of fermentation time will depend on the type of vegetables you’re using and the desired level of fermentation.
As a general rule, most vegetables will ferment for 3 to 7 days.
During the fermentation process, you may notice bubbles and a sour smell coming from the jar. This is a sign that fermentation is taking place.
VI. Store and Enjoy
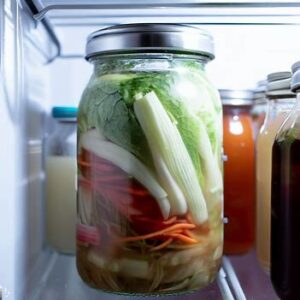
Once the vegetables have fermented to your liking, it’s time to store them. Remove the fermentation weight, cover the jar with a regular lid and store it in the refrigerator. The cold temperature will slow down the fermentation process and help preserve the vegetables.
Fermented vegetables can be enjoyed in a variety of ways. They make a great addition to salads, sandwiches, and wraps. You can also enjoy them as a side dish or snack. Fermented vegetables are a great source of probiotics, which can help to improve gut health and boost the immune system.
It’s important to note that while fermented vegetables are generally safe to eat, there is always a risk of contamination. It’s important to follow proper fermentation techniques and to use clean equipment to reduce the risk of harmful bacteria.
VII. Troubleshooting
Sometimes, even with the best intentions and techniques, fermentation can go wrong. Here are some common issues you might encounter and how to address them:
Mould:
If you see mould growing on top of the vegetables, it’s best to discard them and start again. Mould can be harmful and can make you sick.
Soft or mushy vegetables:
This can be caused by using too much salt or not enough weight to keep the vegetables submerged in the brine. Make sure you’re using the right amount of salt and a suitable weight to prevent this issue.
No bubbles or sour smell:
Can be a sign that fermentation is not taking place. Check that you’re using the right amount of salt and that the vegetables are submerged in the brine. It’s also important to make sure the temperature is suitable for fermentation.
VIII. Conclusion
Fermenting vegetables at home is a fun and easy way to add flavour and nutrition to your diet. By following these simple steps, you can create delicious and tangy fermented vegetables that are packed with probiotics and other health benefits.
Remember to choose the right vegetables, prepare them properly, and follow proper fermentation techniques to ensure success. With a little practice and experimentation, you’ll be a fermentation pro in no time!
Recommendations:
Masontops Complete Mason Jar Fermentation Kit – This kit includes everything you need to start fermenting your own vegetables, including glass fermentation weights, silicone airlocks, and recipe book.
Fermentation Kit for Wide Mouth Jars – This kit includes 4 silicone airlocks and lids, fermentation weights, and a recipe e-book. It’s designed to fit wide-mouth mason jars and makes fermenting vegetables a breeze.
The Art of Fermentation: An In-Depth Exploration of Essential Concepts and Processes from around the World – This book by Sandor Ellix Katz is a comprehensive guide to fermentation, covering everything from the history and science of fermentation to recipes for making your own fermented foods.
Fermented Vegetables: Creative Recipes for Fermenting 64 Vegetables & Herbs in Krauts, Kimchis, Brined Pickles, Chutneys, Relishes & Pastes – This book by Kirsten K. Shockey and Christopher Shockey is a great resource for anyone looking to expand their fermented vegetable repertoire. It includes 64 recipes for fermenting a wide variety of vegetables and herbs.
Pickle Pipe – One-Piece Silicone Waterless Fermentation Airlock Lids – These innovative silicone lids fit on top of wide-mouth mason jars and allow for easy air flow and release during fermentation without the need for water or airlocks. They’re a great alternative to traditional fermentation equipment.