
Curious about “how is cheese made?” From cow’s milk to cheddar, it’s got science and art! Learn the techniques that give cheese its amazing taste.
Knowing how cheese is made lets you shop for your favourite flavours with confidence. Our guide will have you an expert in no time!
Key Takeaway:
- Milk is the star ingredient in cheese making: The type of milk used affects the taste, texture, and appearance of the cheese. Common milk types used include cow’s milk, goat’s milk, and sheep’s milk.
- Curdling the milk is a critical step in cheese making: Coagulant is added to the milk to cause the protein to coagulate and form curds. This process separates the solid curds from the liquid whey.
- The cheese-making process includes several steps: These steps involve preparing, acidifying, curdling, cutting, processing, draining, cheddaring, salting, shaping, and ageing the cheese. Each step is important in creating the desired texture, flavour, and appearance of the cheese.
Introduction: The Magic of Cheese Making
Cheese-making is an intricate process that derives exquisite flavours and textures from milk.
The entire process involves using starter cultures, rennet, and fermenting agents to coagulate the milk, separate the curds and whey, cut and salt the curd, and shape the cheese.
It can then be aged, flavoured, and shaped, resulting in distinct varieties such as fresh cheese, interior-ripened cheese, surface-ripened cheese, cheddar, swiss, and brie.
The brine, horseradish, garlic, paprika, habanero, cloves, and herbs like dill, basil, chives, and rosemary add an extra punch of flavour.
The history of cheese-making dates back 7,500 years, with cheese becoming an essential part of the human diet worldwide.
The Star Ingredient: Milk
Milk: The Key Ingredient in Cheese Production
The production of cheese begins with the star ingredient: milk. The milk used varies by country and region, which influences the final flavour and texture of the cheese.
The quality of the milk is crucial, and different breeds of cows, such as Jersey, produce milk with a higher fat content, which is ideal for making certain types of cheese.
The milk is then heated to a specific temperature and treated with starter cultures, which begin the acidification process. This acidification, combined with the addition of rennet, causes the milk to coagulate, resulting in the formation of curds.
Cutting the curd into small pieces allows for the separation of the liquid whey from the solid curd.
The curd goes through a series of stages to create different types of cheese. This includes fermentation, moulding, and ageing, which allow for the development of unique flavours and textures. Some cheeses, such as Muenster, are also flavoured with additional ingredients during the cheese-making process.
Tip: When making cheese at home, be sure to carefully follow cleanliness and safety protocols to prevent contamination and ensure the quality of the final product.
Common Types of Milk Used in Cheese Making
There are various types of milk that are commonly used in the cheese-making process. These include goat’s milk, sheep’s milk, cow’s milk, and buffalo milk. Each type of milk has unique characteristics that affect the flavour and texture of the cheese produced.
Type of Milk | Source | Flavor Profile |
Goat’s Milk | Goats | Tangy and slightly sweet |
Cow’s Milk | Cows | Mild and buttery |
Sheep’s Milk | Sheep | Rich and nutty |
Each type of milk has a different fat content, protein makeup, and pH level. These differences can impact the overall flavour and texture of the cheese produced. For example, goat’s milk has less fat than cow’s milk but higher levels of protein. This can make cheese made from goat’s milk tangier and slightly more acidic tasting.
Tip: When working with moulds or flavourings in cheese making, be sure to follow sanitation guidelines to avoid any contamination or spoiling during the ageing process.
Coagulant: A Vital Ingredient in Cheese
The coagulant is a crucial component that plays a vital role in the cheese-making process. It can be of animal, vegetable, or microbial origin and aids in the separation of milk into curds and whey.
The type and amount of coagulant used vary based on the desired texture and flavour of the cheese.
Cheese coagulation occurs when the coagulant breaks down milk protein, primarily casein, causing it to clump together and form curds. The reaction also releases whey, which contains water, lactose, minerals, and some proteins.
After cutting the curd, it is drained, shaped with traditional techniques or moulds, salted for flavour preservation before being aged for unique textures and tastes.
Coagulants derived from animals include rennet sourced from calf stomachs, while vegetarian alternatives are produced using microbial sources like fungi or bacteria such as Mucor miehei or Bacillus subtilis natto.
Several enzymes used in commercial production include CMF (Chymosin Milk Ferment), FPC (Fermentation-Produced Chymosin), and Microbial Rennet due to their efficient performance.
How Is Cheese Made: A Step-by-Step Guide
The process of creating cheese involves several intricate steps. From coagulating milk to ageing, each stage plays a crucial role in determining the flavour and texture of the cheese.
Here’s a step-by-step guide on how cheese is made to help you understand the process.
- Coagulation – Milk is heated and mixed with rennet, an enzyme that causes coagulation, resulting in curd formation.
- Curd Cutting – The curds are then cut into small pieces to release the whey, which is a liquid component of milk.
- Cooking – The curds and whey are heated in water to achieve the desired texture of the cheese.
- Moulding – The curds are then placed in moulds to form the desired shape and size of the cheese.
- Ageing – After moulding, the cheese is either ready to eat or is aged for a specific duration, depending on the type of cheese and flavour desired.
While the cheese-making process follows a standard procedure, different variations in ingredients, timings, and temperatures lead to the creation of unique flavours and textures among the different types of cheese. These include cheddar, mozzarella, brie, and parmesan, among others.
A dairy farmer once shared his experience with the cheese-making process. He mentioned how the type and quality of milk affect the final product. He also discussed the importance of maintaining proper hygiene and cleanliness during the process to ensure the cheese’s safe consumption.
Step 1: Preparing the Milk
To begin the process of creating cheese, it is essential to first prepare milk that is suitable for curdling and fermenting.
Here is a simple 3-step guide to preparing milk for cheese-making:
- Start by selecting high-quality, fresh milk from a trusted source. The type of milk can vary depending on the kind of cheese being made and can range from cow’s milk to buffalo’s and goat’s milk.
- Heat the milk to a certain temperature that will allow for coagulation to occur. The temperature required will depend on the kind of cheese you are making, but usually ranges between 86-100°F.
- Add a coagulant like rennet to the heated milk, which will cause it to solidify into curds and whey, which are then separated.
It is important to note that using raw or unpasteurized milk in this process could carry health risks due to harmful bacteria that may be present in it.
In addition, ensuring that all equipment used in preparing the milk is thoroughly cleaned and sanitised is vital to keep the cheese free from contaminants.
Keeping these tips in mind while preparing your milk can lead to successful results when creating your own distinctive cheese.
Step 2: Acidifying the Milk
To create cheese, acidification of the milk is one of the crucial steps. During this process, milk proteins coagulate and form curd, which naturally separates from liquid whey. The acidity level influences the texture and flavour of the final cheese product by regulating the activity of enzymes.
- Introduce lactic bacteria cultures – Bacteria are added to the milk that consumes lactose in it for their growth and metabolic activities. Lactose fermentation results in lactic acid production.
- Regulate temperature and time – Warmth facilitates bacterial growth that increases acidity in a favourable environment. Lactobacillus bulgaricus is used at temperatures ranging between 30°C-38°C while Streptococcus thermophilus grows best at higher temperatures around 40°C-45°C.
- Observe pH levels – Cultivation continues until pH reaches around 4.6, a threshold limit where protein coagulation occurs efficiently.
- Determine the end-point – Coagulated curds separate from whey when further enzyme reactions are inhibited by cooling down or removing whey.
The quality and flavour profile are influenced by selecting appropriate bacterial strains matched with proper temperature conditions for growth rates, where careful control over pH limits avoids undesired results.
Milk’s souring has been utilised since ancient times to produce cheese products. Legends suggest that cheesemaking occurred accidentally when travellers stored milk in sheep stomachs during warm weather days for preservation rather than consuming fresh milk immediately.
Step 3: Curdling the Milk
During the cheese making process, the step involving the separation of milk into curds and whey is crucial. This step is known as milk curdling and is necessary to produce different varieties of cheese.
- Adding a coagulant like rennet or vinegar to warm milk initiates the curdling process.
- The mixture is then left undisturbed for 20-30 minutes until it thickens, creating clumps of curd.
- The curdled mixture is then cut with a knife or wire tool, separating it from the clear liquid whey.
- Finally, the curds are formed into blocks or shapes by pressing them into moulds and draining off excess whey.
Therefore, initialising and achieving successful milk curdling plays an important part in how cheese comes to be.
It’s worth noting that the type of coagulant used in this process can vary depending on the type of cheese being produced. For example, soft cheeses like ricotta will use acidic coagulants like vinegar, while hard cheeses will use microbial or animal-based rennet.
Don’t let poor milk curdling skills hinder you from enjoying fresh homemade cheese. Start experimenting with these expert techniques now!
Step 4: Cutting the Curd
When creating cheese, one important step is to carefully cut the curd. This helps to determine the final texture and consistency of the cheese.
Here is a simple 4-step guide to cutting the curd during cheese making:
- Use a long-bladed knife or curd harp to make vertical cuts through the curd mass. The cuts should be equally spaced apart and go all the way to the bottom of the pot or container.
- Rotate the pot 90 degrees and repeat the process so that crosswise cuts are made through the curd.
- Allow some time for the cut pieces of curd to heal together. Keep stirring gently every few minutes, but avoid being too rough as it can cause excessive whey loss.
- Return the pot or container back to the heat and slowly stir until you see that whey separation has occurred.
During this step, it’s essential to maintain proper temperature control, careful agitation, and steady pressure application. The cutting of curds may take varying amounts of time depending on numerous factors, including cheese styles, cultures used, etc.
Tip: The size and shape of the pieces you cut will influence how well they knit together later!
Step 5: Processing the Curd
To prepare cheese, the crucial process is ‘Processing the Curd.’ It involves several steps to achieve the desired texture and flavour. Understanding and mastering this step can make the cheese-making process more efficient.
- Step 1: Heating the Curd – Heating the curd expels excess moisture and further firms it. The temperature depends on the cheese type, but usually it should be between 100-110°F.
- Step 2: Stirring and Cutting – This step involves stirring and cutting the heated curds to continually release moisture. The size of the cut curd affects the final texture of the cheese.
- Step 3: Draining – After chopping the curds into individual pieces, they are drained using cheesecloth or any other filtration method until no moisture remains.
- Step 4: Pressing – This complicated task entails putting weight on the drained curds to form them into cheese by removing the remaining water content.
It’s essential to note that cutting and heating need significant attention since tough handling may result in dry or crumbly cheese.
Cheese-making requires precision, accuracy, and patience. To ensure quality production, don’t hesitate to invest in high-quality milk yield and produce a consistent batch each time.
Step 6: Draining the Whey
After the curds have developed, it’s time for the next step in cheesemaking. This involves separating solid curds from liquid whey. You can complete this step by following these 5 easy steps:
- Place curds into a sieve or cheesecloth-lined colander
- Gently press down on the curds to eliminate excess whey
- Transfer the curds into a mould and apply pressure
- Flip mould until the cheese is evenly shaped and drier
- Pierce the cheese with small holes to allow air to flow through it during aging.
Once you have completed Step 6: Draining the Whey, you will be left with a solid mass of cheese. It is then ready to move on to the next stage of curing and ageing over several days or several years, depending on the type of cheese being made.
Did you know that Parmigiano-Reggiano cheese must age for at least one year before it can legally be sold?
Step 7: Cheddaring the Cheese
Cheese Making: The Technique of Cheddaring
The cheddaring process is a crucial step in cheesemaking. Once the curd is cut into small pieces, it undergoes a process called cheddaring to expel more whey and develop the firm texture that cheddar cheese is known for.
Here’s a 3-step guide on how to achieve the perfect cheddar cheese:
- Cut the Curd: After allowing the curd to set and solidify, it must be cut into small cubes. This helps increase the surface area and promote further water release.
- Pressing Process: The next step involves stacking these cubes on top of one another, causing them to knit together tightly before flipping them several times and repeating this process; this is demonstrated by pressing the curd. By releasing more whey from the curds, it creates a dense consistency.
- Cutting, Stirring & Stacking: After an hour of pressing has passed, cut out additional pieces of curd that are around ten-pound blocks each; they’re on about every inch so that air can get between them. Broke up and stacked sliced-up pieces together tilted in opposite directions, which permits more drainage than piling them straight-up
It’s important to note that after completing these steps, there may still be residual whey left in the cheese that needs time to drain.
Cheesemaking can have some challenges, but here are some tips for successful cheddaring:
- Use high-quality milk with no antibiotics or hormones added.
- Monitor the temperature closely throughout every step.
- Don’t rush through any steps, as patience leads to a better outcome.
- Invest in proper equipment, like cheesecloth or a good thermometer.
- Practice makes perfect – don’t give up after just one try!
Step 8: Salting the Cheese
Salt is an essential ingredient in the cheese-making process as it contributes to the unique flavour and texture. This step is crucial as it helps preserve the cheese, control bacterial growth, and enhance its taste.
- Once the cheese has been moulded into shape, it is time to apply salt.
- Salt can be applied by rubbing or soaking the cheese in a salt solution.
- The amount of salt used will depend on the type of cheese being made and personal preference.
After salting, the cheese should be left to age for some time until it reaches its desired flavour profile.
It’s worth noting that different types of salt can be used, such as rock salt, kosher salt, or sea salt. Also, some cheeses are not salted but rinsed with wine or cider.
Tip: It’s essential to use high-quality salt in cheesemaking as it can affect overall flavour and preservation.
Step 9: Shaping the Cheese
When shaping the cheese, it’s important to follow a specific process that will ensure the final product is both aesthetically pleasing and flavorful.
Here’s a guide to get you started:
- Begin by transferring the curds into cheesecloth, using a ladle or slotted spoon.
- Gently gather the corners of the cheesecloth together and press out any excess whey.
- Place the cheesecloth-wrapped curds into a mould or colander to shape your cheese.
- Depending on how you’d like your cheese to look, you may also choose to add decorative imprints or patterns at this stage.
It’s worth noting that no two cheeses are exactly alike, so don’t be afraid to get creative with your shaping techniques. And remember: proper sanitation is crucial throughout the entire cheese-making process.
Finally, our team has come across one particular story in which an artisan cheesemaker from France uses only traditional methods to make their cheese.
No machines are involved in shaping their products! The result is a truly unique flavour and texture that can’t be found anywhere else in the world.
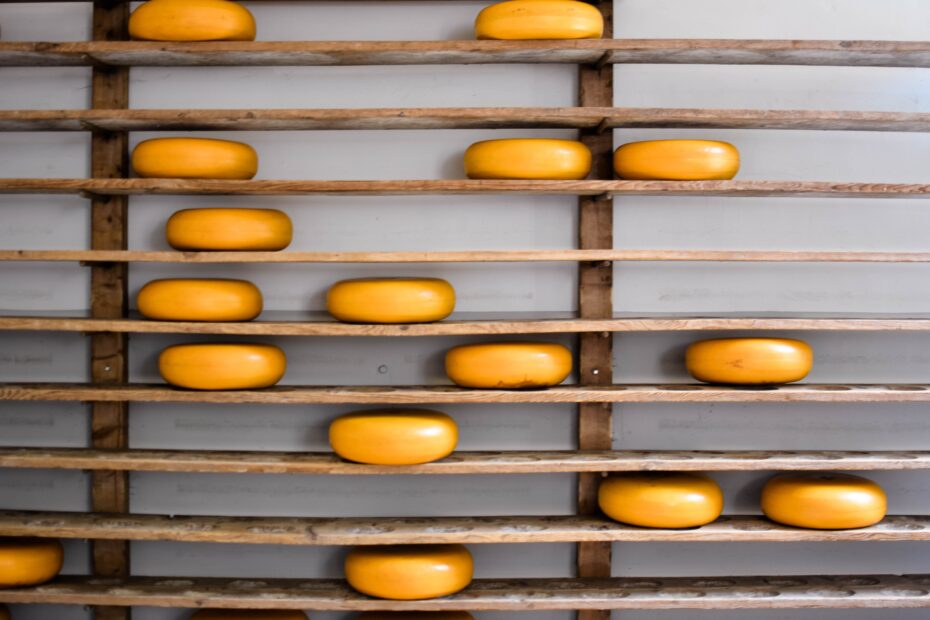
Step 10: Ageing the Cheese
The ageing of cheese is an essential process in the final preparation of cheese.
- Step 1: Identify the type of cheese being aged – Different types of cheese have different ageing requirements. Cheesemakers need to identify the kind they are working with and its ageing needs.
- Step 2: Create optimal Ageing Conditions – Temperature, humidity, and airflow have significant roles in determining the quality and flavour of the final product.
- Step 3: Monitor Ageing Progression – Time plays a crucial role in ageing cheese. Cheesemakers need to regularly check on their products during the ageing process to make sure that everything is going as planned.
The length of time for which a given cheese should be aged varies widely according to one’s personal preferences and cultural traditions, but typically lasts several months.
Once harvesting, pasteurising, brining, inoculating, draining, moulding pressing, and finally curing (drying) are over with each variety of cheese ultimately begins a maturation or ageing stage.
Temperature humidity conditions are controlled very delicately while yeasts mould bacteria continue to develop within the surface of these rinded wonders.
Don’t miss out on obtaining a beautifully aged topping for any meal you prepare by avoiding this vital step when making your own cheese at home.
How Is Fresh Cheese Made?
Fresh Cheese Making Process:
Discover the five-steps involved in producing fresh cheese from raw milk in your own kitchen.
- Heat the Milk – Warm the milk to approximately 86°F, ensuring that it doesn’t exceed 90°F.
- Add Culture – Install culture in the milk, which promotes acid growth.
- Coagulation – Implement key enzymes (rennet) that cause the milk solids to clump together.
- Draining the curd – Remove the liquid whey and transfer the solids to a cheese cloth.
- Pressing the cheese – Ready for consumption, your fresh cheese now requires refrigeration for short-term storage.
Extra Tip: Immerse your cheese in an ice bath, followed by direct sunlight exposure. It is a great way to generate a thin rind that adds flavour to your cheese.
True Story:
A dairy farmer friend shared his freshest cheese batch with me. The cheese had hints of fruit, a smooth, milky texture, and an eternal aroma. Fresh cheese production is both an art and a science, with every producer introducing something different.
Conclusion: Appreciating the Art of Cheese Making
The intricate process of cheese-making is an art form that deserves appreciation. Understanding the complex techniques involved and the science behind them enables a greater appreciation for the final product.
From selecting the optimal milk and coagulating it, to pressing and maturing the cheese, each step requires precision and expertise. By grasping the nuances of cheese-making, we can gain a newfound respect for the craftsmanship and dedication of those who indulge in this time-honoured practice.
It is fascinating to note that different types of cheese result from varying techniques, from adding different bacteria to controlling temperature and humidity during the ageing process.
Furthermore, the taste of cheese is influenced by its origins, with the treatment of cows or sheep and the geography of the region playing a significant role. By keeping these factors in mind, one can truly appreciate the complexities of this beloved food.
In addition to the technicalities, understanding the history and cultural significance of cheese-making can also enhance our admiration for it. It is an art form that has been passed down for generations and has played a crucial role in various societies throughout the ages.
Don’t miss out on the opportunity to savour the unique and diverse flavours of cheese while gaining a deeper understanding of its rich history and intricate process. Indulge in this traditional and timeless food and take a moment to appreciate the fascinating science and skill that go into every bite.
Some Facts About How is Cheese Made:
- ✅ Cheese is made from milk, which is pasteurised and then subjected to a series of processes to form curds and whey. (Source: Cheese.com)
- ✅ Different types of cheese require varying levels of acidity, salt, and aging to develop their distinctive flavors and textures. (Source: Culture Cheese Magazine)
- ✅ Cheesemakers may use different types of bacteria and molds to create specific flavor profiles and textures. (Source: Food and Wine)
- ✅ The process of making cheese has been around for thousands of years, with evidence of cheesemaking dating back to ancient civilizations like the Egyptians and Greeks. (Source: National Geographic)
- ✅ Cheese making is considered an art form, with many small-scale artisanal cheese makers using traditional methods to produce high-quality, unique products. (Source: The New York Times)
FAQs About “How Is Cheese Made?”
How is cheese made?
Cheese-making involves a complex process that varies depending on the type of cheese. Broadly speaking, cheese is made by coagulating milk proteins and separating the curd from the whey. The curd is then formed, drained, and aged to achieve different textures and flavours.
What are the main ingredients used in cheese-making?
The main ingredient in cheese-making is milk, which can come from various animals such as cows, goats, and sheep. Other key ingredients include rennet, which helps coagulate the milk proteins, and cultures, which add flavour and help develop the cheese’s texture.
What is the role of bacteria in cheese-making?
Bacteria play a crucial role in cheese-making as they help to ferment the milk, breaking down lactose into lactic acid and creating the characteristic tangy flavour of cheese. Some bacteria are also responsible for creating holes in cheeses like Swiss and Gouda.
What is the difference between soft and hard cheeses?
Soft cheeses have a high moisture content and a smooth, spreadable texture, while hard cheeses have a lower moisture content and a firmer, crumblier texture. The difference in texture is due to the amount of whey removed during the cheese-making process and the length of time the cheese is aged.
What is the process of ageing cheese?
After the cheese is formed, it is typically pressed to remove any remaining whey and then placed in a cool, humid environment to age. During this time, the cheese develops its flavour and texture as it is broken down by bacteria and enzymes. Some cheeses are aged for just a few weeks, while others can be aged for years.
What are some common types of cheese?
There are hundreds of types of cheese, but some of the most common include cheddar, mozzarella, brie, feta, and parmesan. Each cheese has its own unique flavour and texture, which are determined by the milk used, the cheese-making process, and the length of time the cheese is aged.