Skip to content

How To Ferment Cabbage: Easy Step-by-Step Guide

As a fermentation enthusiast, I have found that ferment cabbage is one of the easiest and most rewarding things to do.

Not only does it result in delicious and nutritious sauerkraut, but it also helps to preserve the cabbage for longer periods of time.

In this article, I will provide you with an easy, step-by-step guide on how to ferment cabbage at home.

How to ferment cabbage

Whether you are new to fermentation or an experienced fermenter, this guide will help you create a batch of tasty sauerkraut that you can enjoy all year.

The Benefits of Fermented Cabbage

As someone who has been fermenting cabbage for years, I can attest to the numerous benefits it provides.

Here are just a few:

  • Improved Digestion and Nutrient Absorption

Fermented cabbage is a great source of probiotics, which can improve gut health and aid digestion.

Additionally, the fermentation process breaks down the cabbage, making its nutrients more bio-available to your body.

This means that you can get more nutritional value out of fermented cabbage than you would from raw cabbage.

  • Extended Shelf Life

One of the best things about fermented cabbage is that it can last for months in the fridge.

This means that you can enjoy it long after fresh cabbage has gone bad.

This is especially useful if you have a lot of cabbage on hand and don’t want it to go to waste.

  • Enhanced Flavour

Another benefit of fermented cabbage is its delicious flavour.

The tangy, sour taste is a result of the fermentation process, and many people find it to be a tasty addition to meals.

Fermented cabbage can be used in a variety of dishes, from salads to sandwiches to stir-fries.

Did you know that fermented cabbage is also known as sauerkraut? This traditional German dish has been enjoyed for centuries and is a staple in many cultures around the world.

  • Easy to Make

Despite its many benefits, fermented cabbage is surprisingly easy to make.

All you need is cabbage, salt, and a jar or crock to ferment it in.

There are many recipes available online, and once you get the hang of it, you can experiment with different flavours and ingredients.

Fun fact: Fermented cabbage was originally used as a way to preserve food before refrigeration was invented. It was a common practice in many cultures, and is still popular today.

Read Our Article About How to Make Sauerkraut HERE

What You Will Need

Equipment needed to ferment cabbage

To get started with fermenting cabbage, you will need a few basic supplies:

  • A large bowl
  • A sharp knife or mandoline slicer
  • Sea salt (non-iodized)
  • A glass jar with a tight-fitting lid
  • A weight (such as a smaller jar filled with water)

Preparing the Cabbage

Start by removing the outer leaves of the cabbage and setting them aside.

Cut the cabbage into quarters and remove the core.

Slice the cabbage into thin strips using a sharp knife or mandoline slicer.

Place the sliced cabbage in a large bowl.

Adding Salt and Massaging the Cabbage

Add sea salt to the cabbage, using about 1-2 tablespoons per head of cabbage.

Massage the salt into the cabbage with your hands, squeezing and kneading the cabbage until it starts to release its juices.

Make sure to use non-iodized salt, as iodine can inhibit the growth of beneficial bacteria.

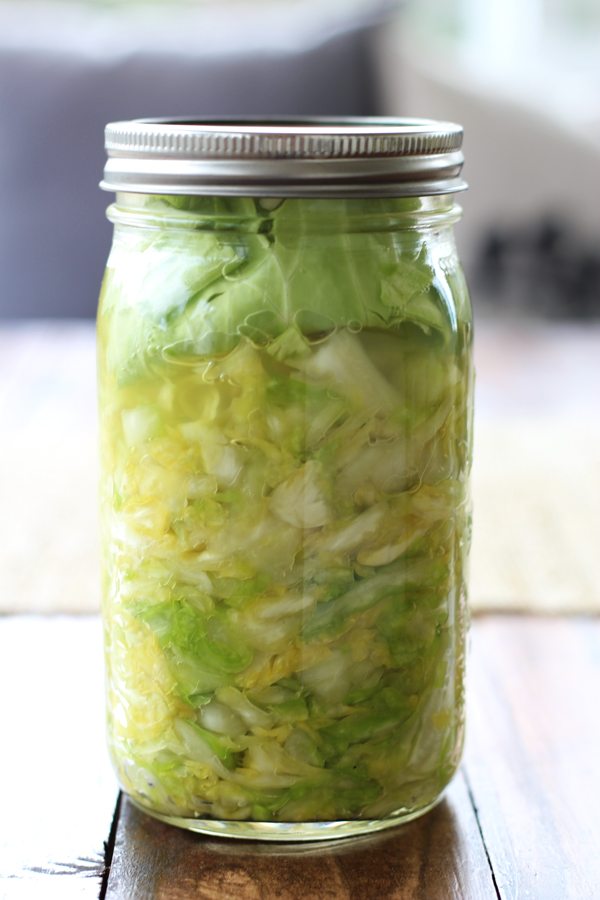
Packing the Cabbage into a Jar

Transfer the cabbage and its juices into a glass jar, packing it down tightly with your hands or a spoon.

Make sure the cabbage is completely submerged in its own juices.

It’s important to use a glass jar, as metal or plastic can react with the acidic environment created during fermentation.

Adding a Weight and Covering the Jar

Place a weight on top of the cabbage to keep it submerged in its juices.

This can be a smaller jar filled with water or a specially designed fermentation weight.

Cover the jar with a tight-fitting lid.

Keeping the cabbage submerged in its juices is crucial to preventing mould and spoilage.

The Steps to Fermenting Cabbage

As someone who has fermented cabbage many times, I can tell you that it’s a simple and rewarding process.

Here are the steps to follow:

Shredding the Cabbage

Begin by removing any outer leaves that are damaged or wilted.

Then, using a sharp knife or mandoline slicer, shred the cabbage into thin strips.

Did you know that you can also use a food processor to shred the cabbage? This can save you a lot of time and effort.

Once you have shredded the cabbage, measure out 1-3 tablespoons of sea salt for every pound of cabbage (depending on your taste preferences).

Adding Salt and Letting it Sit

Sprinkle the salt over the shredded cabbage and use your hands to massage it in.

This will help to release the cabbage’s natural juices.

Once the cabbage is thoroughly mixed with the salt, transfer it to a large bowl and let it sit for about an hour.

During this time, the salt will continue to draw out more liquid from the cabbage.

Tip: You can also add other vegetables and spices to your sauerkraut? Carrots, garlic, and ginger are all great additions.

Packing the Jar and Weighing it Down

After an hour has passed, transfer the cabbage and its juice to a glass jar.

Use your fist or a wooden spoon to pack the cabbage down tightly, making sure there are no air pockets.

Place a weight (such as a smaller jar filled with water) on top of the cabbage to keep it submerged in its own liquid.

This will prevent mould from forming on the surface.

Did you know that you can also use a fermentation crock to make sauerkraut? These crocks have built-in weights and airlocks that make the process even easier.

Covering and Storing

Put a lid on the jar and store it in a cool, dark place for at least 3 days.

Check on it daily to make sure the cabbage is still submerged and to release any built-up gas by opening the lid briefly.

Tip: Use a tea towel or cheesecloth to cover the jar instead of a lid? This allows air to circulate while still keeping out dust and insects.

Taste Testing and Transferring to the Fridge

After 3 days, start tasting the sauerkraut daily until it reaches your desired level of tanginess.

This can take anywhere from 3 to 14 days, depending on the temperature and humidity of your environment.

Once the sauerkraut has reached your desired level of tanginess, remove the weight and put a regular lid on the jar.

Store it in the fridge, where it will continue to ferment slowly but won’t become too sour.

Now that you know the steps to fermenting cabbage, give it a try and enjoy the delicious and healthy results!

Tips for Success

Tips on ferment cabbage

From my personal experience, fermenting cabbage is a simple process that can be improved with a few tips:

  • Use High-Quality Sea Salt

Non-iodized sea salt will provide the best flavour and help prevent mould growth.

It’s important to use high-quality salt to ensure the best taste and texture of your sauerkraut.

  • Keep Everything Clean

Before starting, make sure all of your equipment (including your hands) is thoroughly cleaned.

This will prevent any unwanted bacteria from contaminating your sauerkraut and ruining the fermentation process.

Did you know that using tap water can also introduce unwanted bacteria? It’s best to use filtered or distilled water to ensure the best results.

  • Don’t Overfill the Jar

Leave some head-space at the top of the jar to allow for expansion during fermentation.

Overfilling the jar can cause the sauerkraut to overflow and make a mess.

  • Check on it Daily

Checking on your sauerkraut daily will help you catch any issues early on and release built-up gas to prevent explosions.

It’s important to keep an eye on the fermentation process to ensure the best results.

Fact: the temperature of your fermentation area can also affect the outcome of your sauerkraut. Keeping it at a consistent temperature between 65-75°F will help ensure success.

  • Experiment with Flavours

Once you have the basic process down, try adding other ingredients like garlic, ginger, or caraway seeds to create different flavours.

This is a fun way to personalise your sauerkraut and discover new flavour combinations.

The Bottom Line

Fermenting cabbage is an easy and rewarding way to create your own delicious sauerkraut.

With just a few simple steps and some basic supplies, you can enjoy the many benefits of this traditional food.

Give it a try and see how easy it can be!

FAQs About Ferment Cabbage

Q: How long do you ferment cabbage?

A: Cabbage fermentation typically takes 1-4 weeks, depending on desired flavour and texture.

Q: Is fermented cabbage safe to eat?

A: Fermented cabbage is generally safe to eat and can provide probiotic benefits for digestion.

Q: What happens when you ferment cabbage?

A: When cabbage is fermented, beneficial bacteria convert sugars into lactic acid, creating a tangy taste and enhancing preservation.

Q: What is fermented cabbage good for?

A: Fermented cabbage is good for gut health, immune support, and may aid digestion due to its probiotic content.

Q: Does fermenting cabbage produce alcohol?

A: Cabbage fermentation primarily produces lactic acid, not alcohol, unless intentionally left for extended periods.

Q: Do you need salt to ferment cabbage?

A: Salt is commonly used to inhibit harmful bacteria and promote fermentation; it’s generally recommended for cabbage fermentation.

Q: What vegetables should not be fermented?

A: Vegetables prone to turning mushy or slimy, like cucumbers or zucchini, should be avoided for fermentation.

Q: Do you wash cabbage before fermenting?

A: It’s best to rinse cabbage before fermenting to remove dirt, but leaving some outer leaves unwashed can aid fermentation.

Q: Is fermented cabbage good for IBS?

A: Fermented cabbage may provide relief for some individuals with IBS, but individual responses may vary.