Skip to content

How To Make Home Made Yoghurt

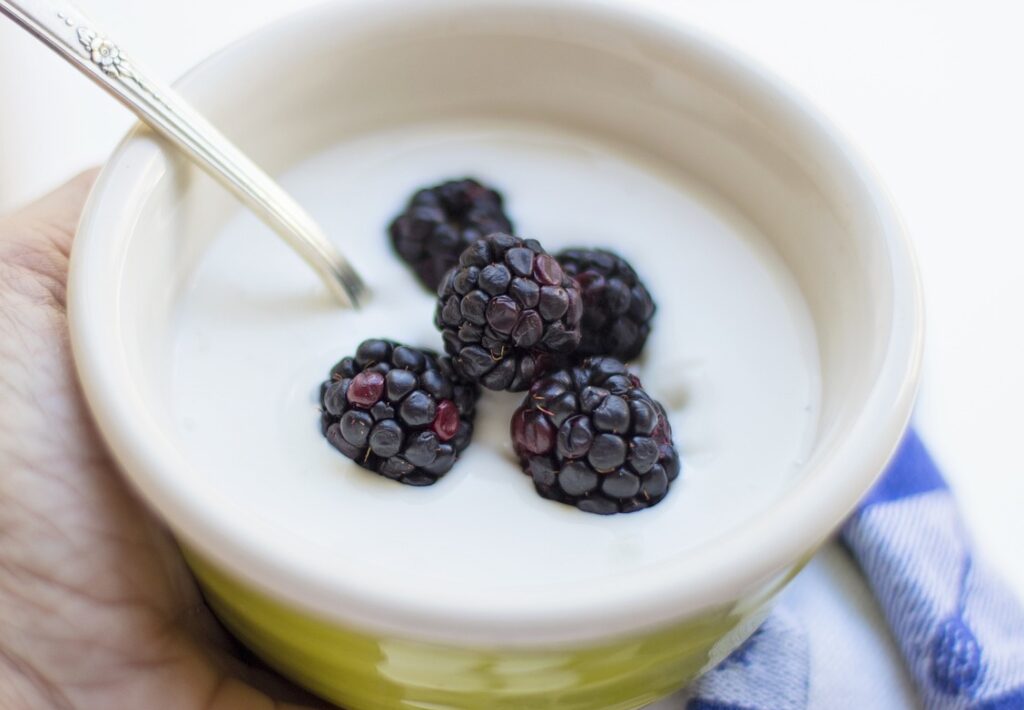
Home Made Yoghurt is a delicious and nutritious fermented food that can be easily made. 

With just a few basic ingredients and equipment, you can customise your yoghurt to your preferred taste and texture while reaping the health benefits of live bacterial cultures. 

In this topic, we’ll explore how to make home made yoghurt step-by-step, including the required ingredients and equipment.

Home Made Yoghurt

Ingredients for Home Made Yoghurt

To ensure that you have all the necessary ingredients for making yoghurt, you’ll need to know what components go into the process.

With this section on ingredients for yoghurt making with milk, live yoghurt culture, and sweetener (optional) as a solution, you can be sure that you have what you need to make delicious home made yoghurt.

Milk

Milk is the key ingredient for yoghurt-making. It’s rich in protein, and needs to be heated to specific temperatures. It affects the texture, flavour, and nutrition of the yoghurt.

Full-fat milk is better for a creamier consistency. Skimmed or semi-skimmed milk can be used too, but it won’t be as creamy. Homogenised milk doesn’t need shaking; whereas unhomogenised milk does.

The fresher the milk, the better it sets during fermentation. Raw milk is not recommended as it can contain bacteria and impurities. Pasteurised milk is best – it’s been heated to kill germs, while keeping its goodness.

Milk has been around for thousands of years, with Ancient Romans using fermented dairy products for their health benefits. Nowadays, many cultures continue to incorporate milk into their diet in various forms, including yoghurt.

Live yoghurt culture

Live bacteria cultures are the secret ingredient for making delicious yoghurt. These cultures contain Lactobacillus bulgaricus and Streptococcus thermophilus, which ferment milk and convert lactose to lactic acid.

Yoghurt made with live bacterial cultures has many health benefits, like improved digestion due to probiotics. But not all yoghurts have live cultures, as they undergo heat treatment or pasteurization. So make sure to pick yoghurt labeled with “live, active cultures” or “probiotic“.

Pro Tip: For a thicker consistency, use cheesecloth to drain the excess whey from the yoghurt. And who needs a sweetener when you can just add a spoonful of bitterness and call it the “breakup special” yoghurt?

Sweetener (optional)

Enhance your yoghurt’s taste with a sweetening agent! It’s not compulsory, but if you’d like to add one, here are some options: Agave Nectar, Honey, Maple Syrup, Vanilla Extract, and Cane Sugar.

These sweeteners can give you greater flavour variety in your batches. But, remember to add it only after heating and cooling the milk, so that the starter culture bacteria have enough nutrients for growth.

Warm agave nectar or honey slightly before stirring it into the milk mixture. This prevents clumping. Too much sugar, however, overpowers the acidity of yoghurt and reduces its health benefits.

Did you know? Sweetening yoghurt with honey has been around since ancient Greece and the Middle East. Athletes believed that blending honey and yoghurt gave them strength, which is why they were known to consume it after workouts.

Equipment needed for making yoghurt

To make yoghurt, having the proper equipment is key. With the right tools at your disposal, you can ensure that your yoghurt-making experience is easy and yields delicious results. 

For equipment needed for making yoghurt, including a saucepan, a thermometer, a mixing bowl, and glass jars, read on to learn how each plays an important role in the yoghurt-making process.

Saucepan

cooking vessel made of metal is a must for making yoghurt! A saucepan is ideal as it can be heated on a low flame with the milk and culture mixed well in it. 

It needs to be stainless steel or aluminum for food safety, and easy to clean with soap and water.

Yoghurt making is an ancient practice, believed to improve overall health & wellbeing due to probiotics in fermented foods.

Who needs a thermometer?! Just stick your finger in the milk and guess the temperature – #yolothecuisinechef.

Thermometer

To measure the temperature of yoghurt, you need a thermometer. A table can help you compare and choose the right one. It should include Type, Range, Accuracy, Response Time, and Battery Life columns. 

Good examples include digital pocket thermometers or infrared non-contact thermometers.

Using a thermometer with a fast response time is key for accurate readings. Plus, it helps maintain the desired temperature during fermentation.

Pro Tip: Calibrate your thermometer before use for accurate readings. Yoghurt-making requires a mixing bowl too!

Mixing bowl

Mixing Container is essential for yoghurt making. It must be strong and large to hold the ingredients without spilling. The ideal size is two quarts. It should be made of stainless steel and be round in shape.

Also, it’s important to ensure that the metal used is not reactive as it could affect the pH levels. A bowl with a cover will give an even temperature during fermentation.

Experts recommend a two-quart bowl for every quart of milk used. It’s best to use a bigger bowl for even mixing. To avoid spillage, place the bowl on a damp kitchen towel or paper towel before stirring.

Like relationships, glass jars can be fragile – but the ones that survive the dishwasher are worth keeping!

Glass jars

Glass containers are a must-have when it comes to making yoghurt. They provide the perfect vessel for your freshly made treat.

  • You must remember to sterilise them before using them by either washing in hot water or running them through the dishwasher.
  • Make sure the lid fits tightly to keep out any air that could spoil your yoghurt.
  • It’s best to opt for small glass jars, as they offer portion control and take up less space in your fridge.

When selecting glass containers, look for ones that have a wide mouth opening for easy pouring of your milk and starter culture mixture.

Take extra caution when handling your glass jars, especially during temperature changes. 

One of my friends once told me about how she accidentally broke one of her favourite jars while making yoghurt, causing a mess all over her kitchen counter.

Time to get serious and make sure your milk is ready for your home made yoghurt!

Preparing the Milk for Home Made Yoghurt

To prepare the milk for yoghurt making effectively, use pasteurised milk, cool it to the right temperature, and add live yoghurt culture. Pasteurising milk destroys the bacteria that could interfere with the growth of yoghurt culture. 

Cooling milk helps to set the yoghurt and prevent a tough curd. Finally, adding live yoghurt culture allows the fermentation process to begin, which is necessary for making yoghurt.

Pasteurise the milk

Before making yoghurt, milk needs to be sanitised. This is a crucial step to avoid bad bacteria or pathogens.

To pasteurise milk, follow these steps:

  1. Heat milk – Put raw milk into a clean pot over medium heat.
  2. Hold at temperature – Let the milk heat to 71°C (160°F) for 10-15 seconds.
  3. Cool milk – Take the pot off the heat and cool it down to below 46°C (115°F).
  4. Bottle/Pour – Pour the pasteurised milk into jars and store in the cooler.

Remember to clean all utensils and equipment before heating the milk. This is to prevent any harmful bacteria from getting into the milk.

Fun Fact: Louis Pasteur invented pasteurisation in the mid-19th century. It is still a key part of food safety today. Want great yoghurt? Start with a chilled milk!

Cool the milk

Lowering the temp of the milk is essential when making yoghurt. This activates cultures and gives a smooth, tangy flavour.

To cool it, do the following:

  1. Put the milk in a big pot or saucepan.
  2. Put the pot in an ice bath or fridge until it reaches 43°C to 46°C.
  3. Stir occasionally and remove from the ice bath once it’s the desired temperature.

It’s important not to cool too quickly as this denatures proteins and affects the texture. To enhance the flavour, some yoghurt makers scald the milk by heating it almost to boiling, then cooling it. This caramelises lactose, adding sweetness and a nutty aroma.

Yoghurt-making dates back thousands of years. Nomadic tribes used to carry milk in animal skin bags and this caused natural fermentation, making yoghurt. 

Ready to culture yoghurt? Time to add live bacteria and hope they like the milk!

Add live yoghurt culture

To make yoghurt, you have to start the fermentation process by adding live yoghurt culture to milk. This is key to getting that tangy flavour and thick texture.

Here’s a 3-step guide to adding live yoghurt culture:

  1. Heat milk to around 80°C. Let it cool to 45°C.
  2. Add two tablespoons of live yoghurt culture per litre of milk.
  3. Mix it up, then incubate at the right temp for several hours until you like the taste and texture.

Make sure the live yoghurt culture is good quality and has enough active cultures. Ask your local dairy supplier or health food store for help choosing the right starter.

Different types of live starters will give different flavours, firmness and texture. So, you may need to experiment. To get the best home made yoghurt, change up your live culture source regularly. Try new ones to get different flavours than before.

Start experimenting with this method today and enjoy the nutritious yoghurt!

Best Fermented Foods for a Healthy Gut & Immunity ⇒ READ MORE

Incubating the yoghurt

To incubate the yoghurt for optimal taste and texture, follow these steps with “Pour the yoghurt mixture into glass jars”, “Incubate the yoghurt”, and “Check the yoghurt for readiness”.

These sub-sections outline the process of transferring the mixture into jars, maintaining the incubation temperature, and periodically checking the yoghurt until it is ready.

Pour the yoghurt mixture into glass jars

  1. Using a ladle or measuring cup, fill clean, sterilised glass jars with the yoghurt mixture.
  2. Leave 1 inch at the top to prevent spills.
  3. Put jars in an incubator or warm spot.
  4. Keep the jars still and sealed for several hours until they set.
  5. Patience is key in this process – the ultimate test of character!

Growing yoghurt cultures is key to delicious and healthy yoghurt:

To do this, let it ferment at the correct temperature in a safe environment.

Here’s a guide:

  1. Prepare your milk and starter culture as per the recipe.
  2. Put it in a sterilised container and close it tightly.
  3. Place it in an incubator or wrap it in a towel. Keep it between 100-110°F (37-43°C) for hours.
  4. Take it out, refrigerate it to stop fermentation.

Different strains need different requirements during fermentation. Research individual types for best results.

Tip: Leave it overnight for 6-8 hours – this will help deepen its flavour, make it tangier, and thicken it. If it’s still liquid, it’s not ready. If it starts shouting ‘I’m a solid, I’m a solid!‘ then it’s overdone.

Check the yoghurt for readiness

To make sure the yoghurt is ready, it’s a must to perform a check. This will tell if the incubation period worked and the yoghurt is cultured properly.

Here’s How:

  1. Take a clean spoon & scoop a portion of the yoghurt into a bowl.
  2. See the consistency of the yoghurt. It should be thick & creamy, not runny or separated.
  3. Smell the yoghurt. It should smell tangy, not sour or off-putting.
  4. Taste the yoghurt. It should be tart, not overly sweet or bitter.
  5. If all is well, you can eat the yoghurt. Otherwise, put it back in the incubator.

Keep in mind that the check for readiness depends on factors like milk type, culture used, and environment like temperature and humidity.

Pro Tip: Use an instant-read thermometer to test milk’s temp before adding culture. This will help get consistent results every time you make yoghurt. Also, adding fruits will give flavour & make you feel healthier even if you ate yoghurt kept in the fridge for a week.

Flavouring and Storing Home Made Yoghurt

To flavour and store your home made yoghurt with ease, add sweetener and flavourings as per your preference.

The right storage temperature and duration can extend the shelf life of your yoghurt. Keep your yoghurt fresh by storing it in the fridge.

Add sweetener (optional)

If you want to add some zest to your yoghurt, consider sweetening it. Here are three ways to add sweetness:

  • Go natural with honey or maple syrup for added nutrients.
  • Go traditional with sugar, but watch the amount – too much can add extra calories.
  • Go sugar-free with Stevia or Splenda – no calories, yet a sweet taste.

Remember not to go overboard with sweetness – the yoghurt already contains milk sugars. Once you’ve added the sweetener, mix it in and let it sit for 10-15 minutes before refrigerating.

For long-term storage, avoid adding sweeteners and flavourings in bulk, as they might cause spoilage. Better to keep them separate and add upon consuming.

Treat your taste buds to a flavour makeover – your yoghurt will thank you!

Add flavourings (optional)

Flavoring Yoghurt is a Breeze!

Taste buds rejoice! Yoghurt can be flavoured in many ways. Try adding fruits, honey, or nuts! Here are 3 tips to create a unique flavour:

  • Citrus: Squeeze lemon or lime over your yoghurt
  • Spices: Sprinkle cinnamon, nutmeg, or turmeric onto your yoghurt
  • Sweeteners: Drizzle honey or maple syrup for a touch of sweetness

Experiment with different flavours to find the perfect blend. Everyone’s taste is unique!

Pro tip: Avoid acidic ingredients like pineapple and kiwi if storing yoghurt overnight.

Fun fact: Ancient Bulgarians referred to yoghurt as “The Food of the Gods“.

Warning: If your yoghurt starts to walk out of the fridge, it’s time to clean it!

Store yoghurt in the fridge

Preserving yoghurt? Refrigeration is key! It stops it from going sour, extends its shelf life, and keeps it creamy. Plus, this halts bacteria from multiplying, preventing spoilage.

Enhance the flavour? Aromatize and sweeten it. Or, add toppings like fresh or dried fruit, nuts, or syrups for extra sweetness. Serve ’em up right away!

No worries if your home made yoghurt goes wrong. It’s not the end of the world – just the end of some bacteria.

Troubleshooting common Home Made yoghurt problems

To troubleshoot common yoghurt-making problems with ‘How To Make Yoghurt’, you need to understand the sub-sections – yoghurt is too runny, yoghurt won’t set, and yoghurt has a sour taste.

Each of these sub-sections holds unique solutions that can help you achieve the perfect consistency, texture, and taste of yoghurt.

Yoghurt is too runny

Yoghurt that’s too thin or runny isn’t as yummy. This can be due to milk not heated enough before adding culture, too much water, skimmed milk instead of whole milk, or not enough incubation time. If milk isn’t hot enough, the yoghurt won’t thicken.

Too much water or skimmed milk can also lead to thin yoghurt. Incubating longer helps the cultures produce lactic acid and thicken it up.

Plus, thickeners like cornstarch or powdered milk are handy. Cornstarch should be added during heating, while powdered milk should be blended after fermentation ends, as it may affect culturing.

Making yoghurt with the right ingredients and giving it time is key to getting thicker consistency. Experimenting with recipes may help find the best solution. 

Worried about your yoghurt not setting? Don’t worry, it’s just going through a rebellious phase, like your teenage daughter!

Yoghurt won’t set

When Your Yoghurt Refuses to Harden:

To make it work, here are the steps:

  1. Heat the milk to the correct temperature and add more culture.
  2. Keep the mix warm, stirring occasionally.
  3. Consider variables like milk freshness and cultures used.
  4. Don’t use hot metals or cleaning product containers.

If the yoghurt is still liquidy, try leaving it in a warm place. Avoid incubators that are too cold or too hot.

A thermometer can help you keep the milk’s temp consistent during heating and cooling.

And if all else fails, add some sugar and pretend it was the plan all along.

Yogurt has a sour taste

The tartness of yoghurt is a common issue. It can be caused by extended fermentation, inadequate bacterial culture, or high milk temps. Temperature and culture ratio control can help regulate tartness.

Reduce sour taste by decreasing fermentation duration and/or adding sweeteners. If still sour, double-check fermentation time and add fresh starter culture.

Certain cultures are naturally more sour-tasting than others. A 2018 Journal of Dairy Science study showed various factors can influence flavour profile between strains.

Aim for consistency and optimal healthy bacterial count when making yoghurt at home! You are a yoghurt-making master, enjoy your creamy, tangy masterpiece!

 Kefir Yoghurt For Weight LossREAD MORE

Conclusion: Enjoying Your Home Made Yoghurt!

For savouring your home made yoghurt, try these easy steps:

  1. Select dessert dishes for serving the yoghurt.
  2. Pour into dishes or combine in a bowl for sharing.
  3. Add desired toppings like fruits, honey, or nuts.
  4. Chill in the fridge for 2-3 hours before serving.
  5. Enjoy chilled or at room temp.
  6. Last but not least, ask for feedback from those who try it.

Store remaining yoghurt separately in airtight containers. Avoid metal utensils as they can react with the live cultures and spoil the flavours. Try different liquids like cow’s milk or goat’s milk for altered flavour and texture. 

Also, tweak fermentation times of 8-12 hours to affect thickness and tanginess. Adjustments can provide better taste profiles; so keep experimenting until you find a favourite!

Frequently Asked Questions

Q: How do I make yoghurt?

A: To make yoghurt, heat milk to 180°F and then allow it to cool to 110°F. Next, add yoghurt culture or starter to the milk, and incubate it at about 110°F for 6-8 hours. Finally, refrigerate the yoghurt to stop the fermentation process and allow it to thicken and develop its texture and flavour.

Q: What kind of milk should I use to make yoghurt?

A: You can use any kind of milk to make yoghurt, but whole milk or 2% milk will produce a thicker and creamier yoghurt. You can also use plant-based milks such as soy, almond, or coconut milk.

Q: Do I need a yoghurt maker to make yoghurt?

A: No, you do not need a yoghurt maker to make yoghurt. You can use a regular pot or slow cooker to heat the milk, and then incubate the yoghurt in a warm place such as an oven, a cooler with hot water, or a heating pad with a towel.

Q: Can I use store-bought yoghurt as a starter for home made yoghurt?

A: Yes, you can use store-bought yoghurt as a starter for home made yoghurt. Make sure the yoghurt contains live, active cultures and is not flavoured or sweetened.

Q: How long does home made yoghurt last in the refrigerator?

A: Home made yoghurt will last up to 2 weeks in the refrigerator. The longer you incubate the yoghurt, the tangier it will become, and the thicker it will be.

Q: Can I flavour home made yoghurt?

A: Yes, you can flavour home made yoghurt with fruit, honey, vanilla, or other flavourings. Add the flavourings after the yoghurt has cooled, and mix well before serving.