
Are you ready to impress your friends and family with your very own, delicious homemade wine? Then you’re in the right place! Join us as we take you through a simple, step-by-step guide to how to make homemade wine from the comfort of your home.
Say goodbye to store-bought wine and hello to your new favourite pastime!
How to Make Homemade Wine: Discover the Joy of Winemaking
Are you a wine lover who has always wanted to try your hand at winemaking?
Making homemade wine is a fun and rewarding hobby that can produce delicious results.
With some basic equipment, quality ingredients, and a little patience, you can create your own unique blends of wine that will impress your friends and family.
Winemaking may seem daunting at first, but it’s actually quite simple once you understand the process.
In this article, we’ll guide you through each step of making homemade wine so that you can start creating your own batches right away.
So grab a glass and let’s get started!
Choosing the Right Ingredients: Selecting the Best Fruit and Equipment
The first step in making homemade wine is selecting the right ingredients.
The fruit you choose will determine the flavour and character of your wine, so it’s important to select high-quality produce.
Tips for Choosing the Best Fruit
- Look for ripe, juicy fruit with no signs of mould or decay
- Choose fruits that are in season and locally grown for the freshest flavours
- Consider using organic fruit to avoid pesticides and other chemicals
In addition to fruit, you’ll need some basic equipment to make wine.
Here’s what you’ll need:
Equipment Needed for Making Wine
- Fermentation vessel: This can be a plastic bucket, glass carboy, or stainless steel tank
- Airlock: This allows carbon dioxide to escape during fermentation while keeping oxygen out
- Hydrometer: This measures the sugar content of the juice to ensure proper fermentation
- Sanitiser: This is used to clean all equipment before use to prevent contamination
Did you know that using overripe fruit can result in a wine that is too sweet or has off flavours?
When selecting a fermentation vessel, consider the size of your batch and the material of the vessel.
Glass carboys are popular because they allow you to see the fermentation process, but they can be heavy and breakable.
Plastic buckets are lightweight and easy to clean, but they may scratch and harbour bacteria over time.
Sanitising your equipment is crucial to preventing contamination and spoilage of your wine.
Once you have your fruit and equipment, it’s time to start the winemaking process.
Crush the fruit and add it to the fermentation vessel along with water and sugar.
Use your hydrometer to measure the sugar content and adjust as needed.
Add yeast to start the fermentation process and attach the airlock to the vessel.
Allow the wine to ferment for several weeks, then transfer it to a secondary vessel to clarify.
Finally, bottle your wine and let it age for several months before enjoying it.
Preparing Your Workspace: Keeping Things Clean and Organised
Before you begin making wine, it’s essential to prepare your workspace.
Cleanliness is crucial in winemaking to prevent contamination and spoilage.
Here are some tips for preparing your workspace:
Cleaning Equipment
Clean all equipment thoroughly with sanitiser before use.
This includes your fermenting vessel, airlock, syphon, and any other tools you’ll be using.
Make sure to rinse everything well with water after sanitising.
Choosing a Workspace
Use a separate area of your kitchen or garage that can be easily sanitised.
Avoid working in areas where food is prepared or consumed.
If possible, choose a space with good ventilation to prevent the buildup of carbon dioxide during fermentation.
Organising Ingredients and Equipment
Keep all ingredients and equipment organised and within reach.
This will make the winemaking process smoother and more efficient.
Use shelves, bins, or drawers to store your supplies.
Label everything clearly so you can find what you need quickly.
Remember, a clean and organized workspace is the foundation for a successful winemaking experience.
Minimising Distractions
Try to minimise distractions while you’re working.
Turn off your phone and avoid other activities that could take your attention away from winemaking.
This will help you stay focused and ensure that you don’t make any mistakes.
Cleaning Up
After you’ve finished making wine, clean up your workspace thoroughly.
Wash all equipment with soap and water and sanitise it again before storing.
Wipe down surfaces with a sanitizer solution to prevent contamination.
♦The Importance of Cleaning and Sanitising Equipment Used In Fermentation ⇒ READ MORE
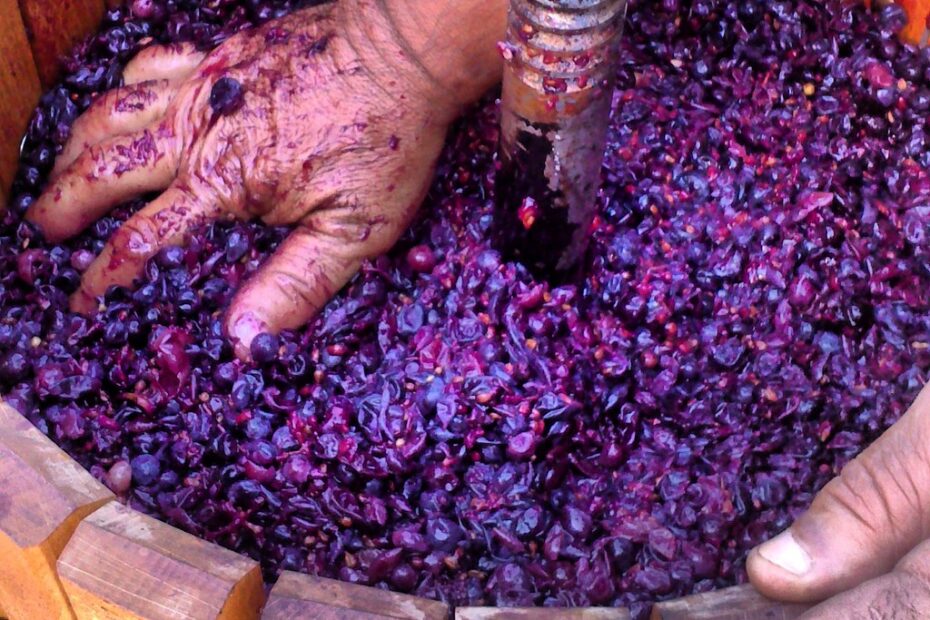
Step One: Crushing the Fruit and Starting the Fermentation Process

When making wine, the first step is to crush the fruit to release its juices.
You can do this by hand using a potato masher or by using a specialised fruit press.
Once you have selected your fruit and prepared your workspace, it’s time to start making wine!
After crushing the fruit, transfer the juice to your fermentation vessel and add yeast.
Yeast is essential for converting sugar into alcohol during fermentation.
Make sure to choose a yeast strain that complements the flavour profile of your chosen fruit.
Choosing the Right Yeast Strain
When selecting a yeast strain, consider the flavour profile of your fruit.
For example, if you are using grapes, you may want to choose a yeast strain that enhances the fruity and floral notes of the grape.
In the case of using apples, you may want to choose a yeast strain that brings out the tartness of the fruit.
It’s also important to consider the alcohol tolerance of the yeast.
If you want a higher alcohol content in your wine, choose a yeast strain with a higher tolerance.
For a lower alcohol content, choose a yeast strain with a lower tolerance.
Did you know that different yeast strains can produce different flavours and aromas in your wine?
Experiment with different strains to find the perfect match for your fruit.
The Fermentation Process
During fermentation, the yeast will consume the sugar in the juice and produce alcohol and carbon dioxide.
It’s important to monitor the temperature and progress of the fermentation process to ensure a successful batch of wine.
After a few days, the fermentation process will slow down and eventually stop.
At this point, you can transfer the wine to a secondary fermentation vessel to clarify and age it.
Did you know that the length of the fermentation process can affect the flavour and alcohol content of your wine?
Longer fermentation times can result in higher alcohol content and more complex flavours.
Step Two: Monitoring and Adjusting the Fermentation Process for Optimal Flavour Development
During fermentation, it’s important to monitor the process closely to ensure optimal flavour development.
Here are some key things to keep an eye on:
Temperature
Fermentation should take place at a consistent temperature between 60-70°F (15-21°C).
Sugar Content
Use a hydrometer to measure the sugar content of the juice regularly.
As the sugar is converted to alcohol, the reading will decrease.
Oxygen Exposure
Too much oxygen exposure can cause off-flavors and spoilage.
Make sure your airlock is functioning properly and avoid opening the fermentation vessel unnecessarily.
Did you know that too much oxygen exposure can cause off-flavors and spoilage?
If necessary, you may need to adjust the pH or acidity of the juice to achieve the desired flavour profile.
This can be done using additives such as citric acid or tartaric acid.
Did you know that you can adjust the pH or acidity of the juice to achieve the desired flavour profile?
Monitoring and adjusting the fermentation process are crucial to achieving the desired flavour profile.
By keeping an eye on the temperature, sugar content, and oxygen exposure, you can ensure that your cider develops the optimal flavour.
Additionally, adjusting the pH or acidity of the juice can help you achieve the desired flavour profile.
- Monitor the temperature between 60-70°F (15-21°C)
- Use a hydrometer to measure the sugar content regularly
- Ensure proper airlock function to avoid oxygen exposure
- Adjust pH or acidity using citric acid or tartaric acid if necessary
Remember, the key to a successful fermentation process is careful monitoring and adjustment to achieve the desired flavour profile.
Step Three: Pressing and Racking the Wine– Removing Sediment and Clarifying Your Wine
Once fermentation is complete, it’s time to remove the sediment and clarify your wine.
This process is called pressing and racking.
Here’s how to do it:
Using a Wine Press or Cheesecloth
Use a specialised wine press or cheesecloth to separate the juice from the solids.
This will help remove any remaining sediment and clarify the wine.
Be sure to follow the instructions carefully to avoid damaging the wine or losing any of the juice.
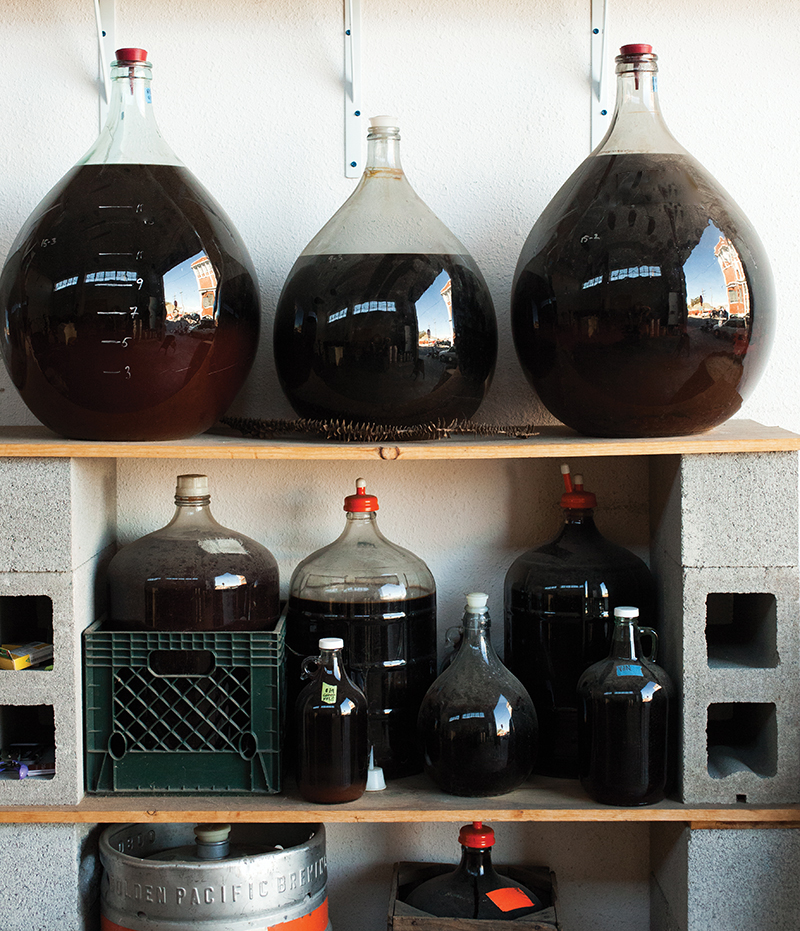
Transferring the Clarified Juice
Transfer the clarified juice to a new fermentation vessel and allow it to settle for several weeks.
This will help any remaining sediment settle to the bottom of the vessel, leaving the wine clear and ready for bottling.
Tip: Be patient during this step.
Allowing the wine to settle for several weeks will ensure that it is as clear as possible.
Syphoning off the Clear Wine
Once the wine has settled, carefully syphon off the clear wine into another vessel, leaving any sediment behind.
Be sure to use a clean syphon and vessel to avoid contaminating the wine.
You may need to repeat this step several times to ensure that all the sediment has been removed.
Tip: If you’re having trouble syphoning off the wine, try using a wine filter to remove any remaining sediment.
Step Four: Ageing Your Homemade Wine– Patience Pays Off in Taste and Complexity
The next step in making homemade wine is ageing.
Allowing your wine to age will help develop its flavour and complexity.
Tips for Ageing Your Wine
Here are some tips for ageing your wine:
- Store your wine in a cool, dark place, such as a cellar or closet
- Use oak barrels or oak chips to add depth and complexity to your wine
- Check on your wine regularly and taste it to see how it’s developing
Ageing times can vary depending on the type of wine you’re making.
Red wines typically require longer ageing than white wines.
Ageing Red Wines
Red wines typically require longer ageing than white wines.
Ageing times can range from a few months to several years.
The tannins in red wine help it to age well and develop complex flavours.
Did you know that some red wines can age for decades? The oldest bottle of wine in the world is a red wine from the year 325 AD!
If you’re making red wine, consider ageing it for at least a year before drinking it.
This will allow the wine to develop its full flavour and complexity.
Ageing White Wines
White wines typically require less ageing than red wines.
Ageing times can range from a few months to a few years.
White wines are generally lighter and fruitier than red wines, and they don’t have the same tannins that help red wines age well.
Did you know that some white wines are meant to be drunk young? For example, Beaujolais Nouveau is a type of white wine that is meant to be consumed within a few months of its release.
If you’re making white wine, consider ageing it for a few months to a year before drinking it.
This will allow the wine to develop its full flavour and complexity.
Best Gin Making Kit (Review) ⇒ READ MORE
Step Five: Bottling and Corking Your Wine– The Final Step in the Winemaking Process
After the fermentation process is complete, it’s time to bottle and cork your homemade wine.
Follow these steps to ensure your wine is properly bottled:
Sanitise Your Bottles and Corks
Before you begin bottling, make sure all bottles and corks are properly sanitised.
This will prevent any unwanted bacteria from contaminating your wine.
Fill Your Bottles
Using a funnel, carefully fill each bottle with your homemade wine.
Leave about an inch of space at the top of the bottle to allow for the cork.
Cork Your Bottles
Insert the cork into the bottle using a corker.
Make sure the cork is inserted all the way to prevent any air from getting in.
Tip: If you’re having trouble inserting the cork, try soaking it in warm water for a few minutes to soften it.
Store Your Wine
Store your bottled wine upright in a cool, dark place for at least a week before drinking.
This will allow the wine to settle and any sediment to settle at the bottom of the bottle.
Fun Fact: Wine bottles are typically stored on their sides to keep the cork moist and prevent it from drying out.
Congratulations!
You’ve successfully bottled and corked your homemade wine.
Now it’s time to sit back, relax, and enjoy the fruits of your labour.
Conclusion on How to Make Homemade Wine
Making homemade wine is a fun and rewarding hobby that can produce delicious results.
By following these simple steps, you can create your own unique blend of wine that will impress your friends and family.
Choose High-Quality Fruit
The first step in making homemade wine is to choose high-quality fruit.
Look for fruit that is ripe, free of bruises, and has a good flavour.
You can use a variety of fruits to make wine, including grapes, berries, and apples.
Once you have chosen your fruit, wash it thoroughly and remove any stems, seeds, or pits.
Then, crush the fruit to release the juice.
Keep Your Workspace Clean
It is important to keep your workspace clean when making homemade wine.
This will help prevent contamination and ensure that your wine turns out well.
Make sure to sanitise all of your equipment before and after use.
You will need a large container to ferment your wine in, such as a glass carboy or a food-grade plastic bucket.
Make sure that the container is clean and sanitised before adding the fruit juice.
Monitor the Fermentation Process Closely
Once you have added the fruit juice to your container, you will need to add yeast to start the fermentation process.
Make sure to choose a yeast that is appropriate for the type of fruit you are using.
During the fermentation process, it is important to monitor the temperature and the specific gravity of the wine.
This will help ensure that the fermentation is proceeding as it should.
Be Patient During Ageing
After the fermentation process is complete, you will need to age your wine.
This can take anywhere from a few months to a few years, depending on the type of wine you are making.
During the ageing process, it is important to store your wine in a cool, dark place.
This will help the wine develop its flavour and aroma.
You can experiment with different types of fruit and yeast to create your own unique blends of wine.
FAQs About How to Make Homemade Wine
Q: How long does it take to make homemade wine?
A: The entire winemaking process can take anywhere from 4-12 months, depending on the type of wine you’re making and how long you choose to age it.
Q: Can I use frozen fruit to make wine?
A: Yes, frozen fruit can be used to make wine.
Just make sure to thaw it completely before crushing.
Q: Do I need a lot of equipment to make wine?
A: You’ll need some basic equipment, such as a fermentation vessel, airlock, hydrometer, and sanitizer.
However, you don’t need to invest in expensive equipment to make good wine.
Q: What types of fruit are best for making wine?
A: Almost any fruit can be used to make wine, but some popular choices include grapes, berries, apples, and peaches.
Q: Is it safe to drink homemade wine?
A: As long as proper sanitation procedures are followed, homemade wine is generally safe to drink.
However, it’s important to remember that alcohol consumption should always be done in moderation.