
Are you ready to indulge in a sweet and tangy adventure? Discover how to make easy and delicious mango chutney right in your kitchen.
This heavenly condiment turns ordinary dishes into mouthwatering masterpieces. Read on and let your taste buds rejoice with this fruity magic!
Selecting the Mangoes
To select the best mangoes for your chutney recipe, you need to know how to choose the right variety and check for ripeness. This will ensure that you have the optimal taste and texture in your dish.
Choosing the right mango variety and identifying a ripe fruit are key steps in making delicious mango chutney.
Choosing the right variety
Choosing the Perfect Mango Variety.
Different varieties of mangoes have different tastes, textures and aromas. For the perfect fruit flavour, one must consider all these factors.
Mango Variety | Flavours | Texture | Aroma |
Alphonso | Sweet & Fragrant | Soft & Juicy | Pleasant |
Ataulfo | Creamy & Buttery | Smooth & Fibrous | Mild |
Honey Gold | Tangy & Sweet | Slightly Firm | Lightly Perfumed |
Keitt | Rich | Velvety | Meaty Faintly Sour |
When selecting the right variety of mango, look for the colour and aroma. Most countries import mangoes from other countries. It’s important to choose a ripe fruit to avoid wasting time.
Regretfully, missing out on fresh and juicy mangoes is a possibility. To avoid this, check the market stalls and talk to local suppliers about new varieties.
With its unbeatable taste and refreshing aroma, getting a beautiful piece of mango is a satisfying experience. Finding the perfect mango is like a game of ‘Hot or Cold’, except it’s ‘Ripe or Rock Hard’.
Checking for ripeness
Mangoes: Pick the Ripe Ones!
Ready to pick the perfect mango? Here’s how to do it.
- Skin colour: Look for a hint of yellow or pink. Not green!
- Texture: Firm, but not hard. No soft spots or indentations.
- Smell: Sweet fragrance? Yum! Sour smell? No go.
- Taste: Sweet with only minor hints of tartness? Delicious!
Need an expert? Ask your local farmer. They know best!
Did you know? People have been growing mango trees for over 4,000 years! The 16th century saw Portuguese travellers introduce them to Africa, and European traders began importing South Asian fruits. Today, over 100 unique types of mango are grown each season.
Time to get slicing and dicing!
Preparing the Ingredients
To prepare the mango chutney as per the recipe, you need to chop the mangoes, slice the onions, crush the garlic, grate the ginger, and measure the spices and other condiments. Each of these sub-sections plays an important role in making the chutney delicious and flavorful.
Chopping the mangoes
Mango Slicing Technique
Slicing mangoes can be tricky. To get perfect slices, use these 3 easy steps:
- Select ripe mangoes.
- Slice off both ends on a chopping board with a sharp knife.
- Make diagonal cuts on each side of the seed without cutting into it. Slice out the flesh carefully.
Care and attention are key when slicing. Don’t let it damage other ingredients.
True story: I learned the hard way to be careful when slicing, after my knife slipped into my finger. Ouch! Use caution even for something as simple as slicing mangoes. Remember, tears while slicing onions just means your body is detoxing from pizza!
Slicing the onions
Ready to add flavour to your dish? Start by prepping your onion!
- Cut off both ends, and peel off the outermost layer.
- Cut it in half from top to bottom.
- Slice each half thinly and evenly with a sharp knife.
- Turn slices perpendicular and chop into small pieces for diced onions.
- Always wash your hands and knife afterwards.
Store unused portions of onion in an airtight container or sealed plastic bag. Don’t let poor ingredient prep ruin your meal – start slicing those onions! And don’t forget about crushing garlic, it’s a great way to release your anger and add flavour too!
Crushing the garlic
Garlic adds flavour and aroma to any meal – but crushing it can be tricky. Breaking its structure is what we call “crushing garlic”. Here’s how:
- Peel the cloves.
- Lay the flat side of the knife over the clove.
- Press down firmly with the heel of your hand.
- Rock the knife to remove any lumps.
- Chop until you get a paste-like consistency.
Be extra careful when using a knife. Fresh garlic gives the best results. The right tool makes crushing less hard. Apply gentle pressure while crushing – no smashing! Rubbing some salt on the chopping board absorbs moisture – it’ll be easier to crush.
Garlic has been around for over 4000 years. Ancient Egyptians used it for therapy. Ancient Greeks used it to boost physical performance. In Asia, they believed garlic could cure illnesses, fatigue and varicose veins.
So go ahead and crush that garlic – it’s therapeutic!
Grating the ginger
Grating ginger is key in the prepping process. To get the best flavour and texture, it’s important to grate the ginger to the right size and consistency. Here’s how to do it like a pro:
- Clean the ginger root properly – get rid of any dirt or impurities.
- Use a fine grater or microplane to grate the desired amount. Make sure no fibres remain.
- Put the grated ginger in cheesecloth or muslin cloth and press down lightly to extract excess liquid.
For the best results, it’s best to grate fresh ginger. Also, it’s better to grate when the root is still firm for better texture and easier handling.
Tip – For an easy grating experience, freeze your ginger root before grating. The solid texture from freezing lets you get smoother and finer grating with ease. Get the exact measurements and a hint of OCD for the perfect spice-up!
Measuring the spices and other condiments
When getting ready to cook, it’s essential to accurately measure the spices and condiments. This will make sure the taste of your dish is balanced every time you make it.
- 1. Use measuring spoons and cups for dry ingredients. Experienced cooks may have a knack for sprinkling the right amount, but it’s not recommended for beginners.
- 2. Read the recipe before you start and measure the spices and condiments needed.
- 3. Remember that different spices have varying levels of intensity – use a smaller amount of stronger flavours.
Sometimes recipes ask you to toast the spices, or mix them together before adding them. Always stick to each step precisely.
Preparing well is the key to making great food! My talented friend shared her secret spice blend with me once. She said that a pinch of this, or a dash of that, can make all the difference. Bring the heat! Spice up the chutney with some flavour! Life’s too short to be bland.
Cooking the Chutney
To cook the chutney with ease and make it delicious, you will need to follow four sub-sections: sautéing the onions, garlic, and ginger, adding the mangoes, mixing the spices and condiments, and simmering the chutney until thickened.
Each sub-section adds a unique flavour and texture to the chutney, creating a perfect blend of sweetness, sourness, and spiciness.
Sautéing the onions, garlic, and ginger
To make chutney base, you must sauté onions, garlic, and ginger. This enhances flavours and aromas, while making a golden mixture – the chutney foundation. Here are five simple steps:
- Heat oil in a pan on medium heat.
- Add finely chopped onions and sauté until soft.
- Add minced garlic and ginger. Sauté for 30 seconds.
- Lower heat and cook lightly browned.
- Your onion-garlic-ginger base is now ready for other ingredients.
Cook slowly so it doesn’t burn. It should be honey-coloured. Overcooking or browning can lead to a bitter taste.
Tip – Hand grate garlic and ginger for more flavour than chopping! Let’s mango our way through this chutney recipe!
Adding the mangoes
Ready to begin your recipe for delicious chutney? Mango is the key ingredient that cannot be missed. Let’s get started with a 5-step guide for adding mangoes:
- Choose ripe and sweet mangoes.
- Peel and discard the seed.
- Cut into small cubes.
- Grind coarsely with a food processor or mixer-grinder.
- Add to other ingredients in a pan. Cook until thickened. Enjoy!
Be careful not to overcook it – it’ll ruin the colour and flavour. To spice up the look, dice the mangoes instead of grating them.
What are you waiting for? Start cooking and share this delicious dish with your family and friends before they miss out!
Mixing the spices and condiments
For a flavourful Chutney, it’s essential to blend the right spices and condiments. Measure and grind the spices for a potent taste. Then, add in condiments like tamarind paste or vinegar for balance.
Mix it all up until smooth and taste test! A pinch of salt can make a huge difference, so don’t forget it.
Experimenting with recipes takes skill and dedication, but it’s worth it when you create something special.
A famous chef learned about various types of Chutney during a trip to India. He was inspired by their distinct flavours and spent years experimenting with them before creating his own signature blend. Get creative with your own Chutney!
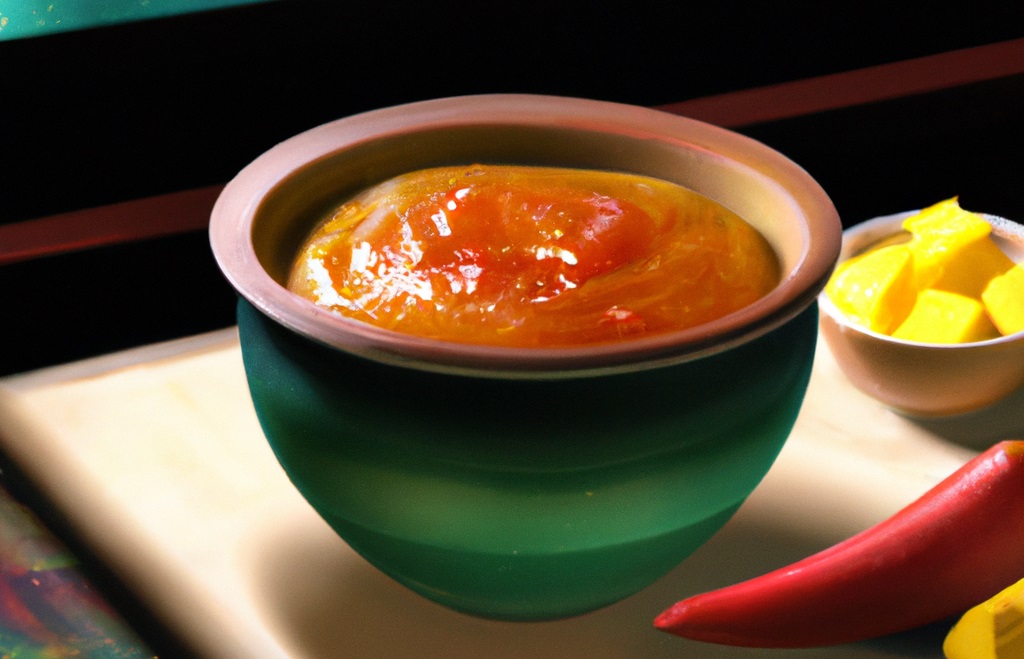
Simmering the chutney until thickened
Transfer the blended ingredients to a pot, boil for a few minutes uncovered. Then, lower the heat and stir continuously to prevent burning.
Let it reduce while stirring occasionally for an hour or until desired thickness. Utilise low heat while cooking and give extra attention towards the end to avoid overcooking.
Chutneys date back to 500 BC in India – the word “chutney” means “to lick” in Hindi. A well-sealed jar of chutney is like a superhero’s costume – protecting the deliciousness inside from all evil forces!
Packing and Storing the Chutney
To properly pack and store your delicious homemade mango chutney, you need to follow a few steps. Sterilising the jars, filling them up with your freshly made chutney, sealing the jars tight, and storing them correctly are crucial steps.
In this section, packed with expert tips, you will learn everything you need to know to store your mango chutney safely.
Sterilising the jars
To keep chutney fresh and safe, it’s necessary to sterilise the jars. Do this with four easy steps:
- Wash the jars in warm soapy water and rinse under hot running water.
- Turn the jars upside down on a baking sheet. Bake them at 300°F (150°C) for 10-15 minutes or boil them in hot water for 10-15 minutes.
- Let the jars cool before handling them.
- Use immediately or store in a clean, dry place.
Caution: Any leftover water in jars can cause bacteria growth and spoil the chutney. Make sure to let them dry completely. Also, inspect old jars for cracks, chips, rust or mould before reusing. This is important for maintaining chutney quality and freshness.
Finally, if you want to fill jars with chutney, find the right mix of chunks and slop to fit perfectly.
Filling the jars with chutney
When it comes to storing chutney, packing it properly is key. Here are the steps to do it right!
- Clean and sanitise jars in hot, soapy water or a dishwasher.
- Then, fill each jar spoon by spoon, leaving space for air circulation.
- Put on lids tightly and label with date made.
- Store in a cool, dark, and dry place away from sunlight.
- Use only fresh ingredients as chutney shelf life is shorter.
Chutneys have been around for centuries; originating in India and spreading across Southeast Asia and Europe. According to Indian tradition, there’s no such thing as too much spice! To keep your chutney fresher than your ex’s excuses, seal those jars tight!
Sealing the jars
To maintain the flavour and freshness of your homemade chutney, it’s important to seal the jars correctly. This stops air or moisture from entering, preventing spoilage. Here’s a 4-step guide:
- Fill sterilised jars with hot chutney and let them cool down.
- Place wax paper or plastic wrap on top of the cooled chutney, touching the mixture.
- Screw the lid tightly and securely, creating an airtight seal.
- Press down on the centre of each lid; they shouldn’t pop back up or make noise.
Using high-quality jars with a tight-fitting lid makes sealing even better. Not only does it keep the chutney fresh, it also boosts its flavour over time.
When storing sealed jars, keep them in a cool, dry spot away from sunlight. Refrigeration is only needed when opened.
Improper sealing can lead to mould growth or dangerous bacteria like botulism. The National Centre for Home Food Preservation recommends water-bath canning for chutney with a pH below 4.6. Follow proper guidelines to avoid health risks.
Make sure your chutney is stored in an airtight container – it could be the difference between a delicious meal and a disaster!
Storing the chutney properly
To keep your chutney fresh and flavorful, store it in an airtight container and refrigerate it right after making. Divide large batches into smaller containers, and label them with dates.
Don’t mix different varieties, keep them separate. For optimal taste, don’t store chutney for too long. Share the yummy mango explosion and let others experience the joy!
♦Fruits That Can Be Fermented – Discover Now! ⇒ READ MORE
Serving the Mango Chutney
To serve the delicious mango chutney that you’ve made, pairing it with the right foods can elevate your meal. Additionally, you can also use the chutney as a dip or spread to add some tanginess to your snacking routine.
If you’re feeling adventurous, try incorporating the chutney into recipes to create unique and exciting dishes.
Pairing the mango chutney with foods
The Mango Chutney is a delightfully tangy and sweet condiment. It works great with a variety of dishes. Here are some ways to use it:
- Grilled chicken or fish with a hint of exotic flavour.
- Roast veggies for a burst of sweetness.
- Use it in sandwiches instead of regular condiments.
- Mix it into rice dishes or use as a dip for appetisers.
It goes well with many cuisines like Indian, Thai, and Middle Eastern. For the best taste, start by adding a small amount. That way, you can enjoy the flavour without overpowering the dish. Plus, it’s a fun way to add tangy sweetness to your life!
Using the mango chutney as a dip or spread
To make use of the delightful flavour of mango chutney, it can be used as a dip or spread. Here are some ideas:
- Spread on crackers or toast for a snack.
- Put it on sandwiches to add a sweet complexity to savoury flavours.
- Dip fresh veggies or chips into it for a unique taste.
- Add it to grilled meats, seafood, or veggies for a citrus flavour.
- Mix it into sauces or marinades for exotic dishes.
Plus, due to its versatility, mango chutney is great as a base for homemade dressings, sandwiches, and pasta dishes.
Tip: Blend mango chutney with Greek yoghurt to cut down sweetness but maintain its tartness. Use this mix to add zing to salads or with Mediterranean dishes.
Add some mango chutney to any dish, and you’ve gone from basic to boujee.
Incorporating the mango chutney into recipes
Mango Chutney – a burst of flavour for any recipe! Here are four ways to use it:
- Spread it on sandwiches for a sweet and tangy twist.
- Mix it with yoghurt or mayo for dips and dressings.
- Glaze grilled chicken, fish or veggies.
- Add to curries and stir-fries for a taste hit.
Pair the mango chutney with Indian dishes like samosas, naan or biryani for the full flavour experience.
For marinade, mix it with olive oil and balsamic vinegar – perfect for pork or chicken.
My aunt once made chicken skewers glazed in homemade mango chutney. It was sweet and spicy and amazing – everyone wanted the recipe!